 Lightroom guru and best selling author, Scott Kelby shares his tips for sharpening and noise reduction in lightroom. These tips were taken from Scott Kelby’s latest book, How Do I Do That in Lightroom?.
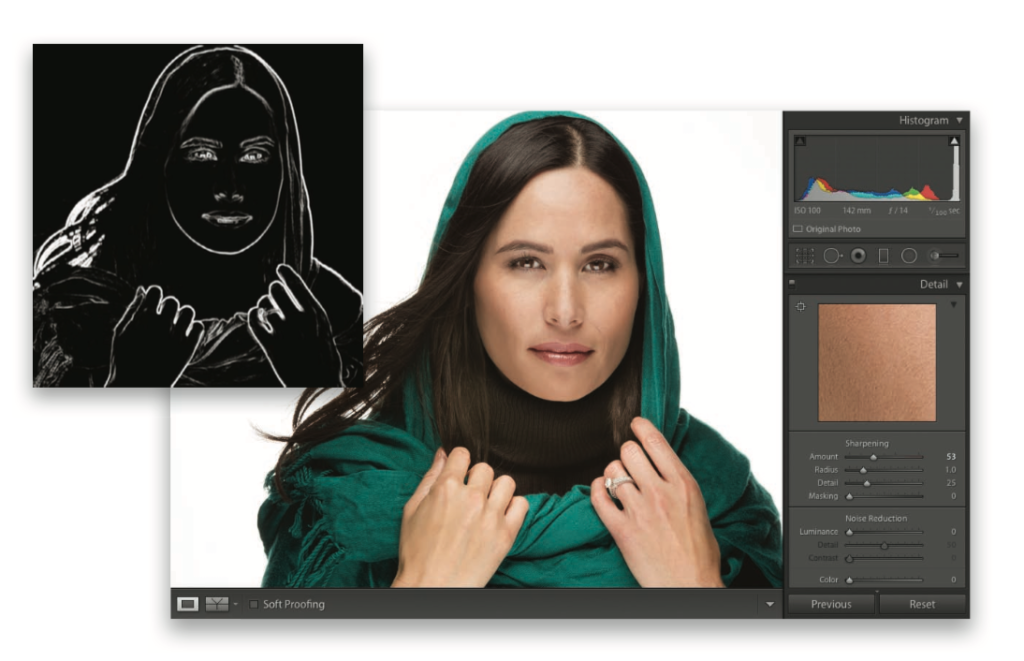
How Do I Do Basic Sharpening?
Go to the Detail panel (in the Develop module’s right side Panels area) and the Sharpening controls are at the top. The Amount slider controls the amount of sharpening (please forgive me for explaining what this slider does). The Radius slider determines how many pixels out from an edge the sharpening will affect, and I usually leave this set at 1.0. If I run into an image that needs to be super-sharp, I’ll occasionally move it up to 1.2, or even as high as 1.3, but that’s about as high as I’ll go. The next slider down is Detail. I recommend leaving this set as-is (I’m not usually a fan of default settings, but this one is actually good).
This slider, set where it is, allows you to apply a higher amount of sharpening without seeing halos around the edges of objects in your image (a typical side effect of too much sharpening), so it’s an improvement on Photoshop’s Unsharp Mask filter. If you want sharpening that looks more like Photoshop’s (hey, ya never know), then raise this slider to 100 and it’s pretty much the same (you can expect to see halos fast if you set the Amount slider too high). Last is the Masking slider. I only use this when sharpening objects where I don’t want the entire image sharpened equally— I just want the edges sharpened. For example, if I’m sharpening a woman’s portrait, I want to sharpen her eyes, eyebrows, teeth, lips, etc., but avoid sharpening her skin because it brings out texture we don’t want to enhance. By raising the Masking amount, it narrows the sharpening to just the edges. Press-and-hold the Option (PC: Alt) key as you drag the slider to see what it’s affecting. Areas that turn black (as seen in the inset above) are not being sharpened—only the white areas get sharpened.
How Do I Reduce Noise in my Photo?
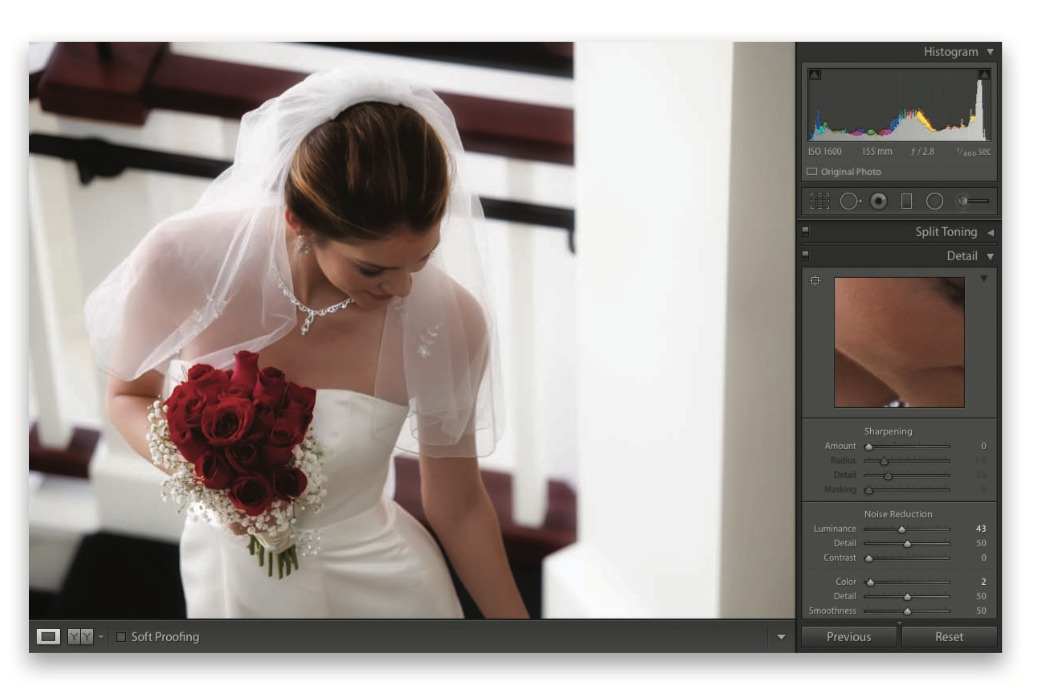
Go to the Detail panel (in the Develop module’s right side Panels area), and you’ll see the Noise Reduction section right below Sharpening. There are two parts to this section: The Luminance slider reduces the noise specks you see in an image by slightly blurring the image (that’s pretty much what noise reduction does—it hides the noise behind a blur). If you drag the Luminance slider to the right, and you start to see that you’re losing either detail or contrast in the image, you can use the two sliders right below to add them back. You’d use the Color slider if you saw red, green, and blue specks in your image—this does a good job of desaturating them, so you don’t see them. Dragging this slider too far to the right can, once again, cause a loss of detail, so you can bring back some of that detail using the Detail slider below. The Smoothness slider is different—it doesn’t bring back stuff. You’d use this to smooth out larger patches of color noise—just drag it to the right to help smooth those patchy areas out (you probably won’t see these larger patches unless you’re brightening up a really dark area in your image). Keep this one thing in mind when you’re reducing noise: Using this feature blurs your image, from a little to a lot, depending on how far you drag the sliders. So, think of this as a balancing act—your job is to find that amount at which the noise is reduced without the image getting too soft.
Want more tips like these? Check out Scott Kelby’s best selling book, How Do I Do That in Lightroom? Plus, get excited about his summer 2016 release, How Do I Do That in Photoshop?