
From The Nikon Creative Lighting System, 3rd Edition by Mike Hagen
Traveling soon? Discover what works best from the three case studies listed below. With insight from Nikon lighting expert, Mike Hagen, you’ll leave for vacation feeling fully prepared for nearly any photography situations!
Case Study 1: Portrait

© Mike Hagen
Overcast days are a photographer’s best friend when it comes to outdoor photography because they provide nice, low-contrast lighting. However, this lighting can frequently result in dark eye sockets when photographing people. To avoid this problem, it helps to use some type of fill flash.
The photo to the right was taken at a pumpkin patch on a cloudy day in October. I used a D70 with an SB-600 fl ash attached to an SC-17 TTL cord. To provide a little bit of fi ll light, I handheld the fl ash above my head and off to the left. The fl ash mode was TTL BL and the power was set to –1.7, so the flash was subtle.
Holding the fl ash up high makes any resulting shadow fall behind and below the subject. Even in bright situations like this, you can sometimes see the shadow in the background, so I like to do as much as I can to eliminate it. I used a white balance of Cloudy –1 to add some warmth to the cool blue light from the overcast sky. Since the D70 has a very fast shutter sync speed of 1/500 second, I could shoot the image at 1/400 second and not worry about blowing out the image with the fl ash. Other cameras like the D200 and D2X need to be configured for Auto FP High Speed Sync (CSM e1) to shoot faster than 1/250 second with flash.
Setup Details
- Camera: D70
- Exposure Mode: Aperture Priority
- Meter Mode: Matrix
- Aperture: f/5.6
- Shutter Speed: 1/400 second
- ISO: 200
- White Balance: Cloudy –1
- Lens: 24-120 mm f/4-5.6
- Sync: Slow + Rear
- Flash: SB-600
- Flash Mode: TTL BL
- Flash Comp: –1.7
- Accessories: Sto-Fen diffusion dome, SC-17 TTL cord
- Image Quality: JPEG Fine Large
Case Study 2: Sunsets
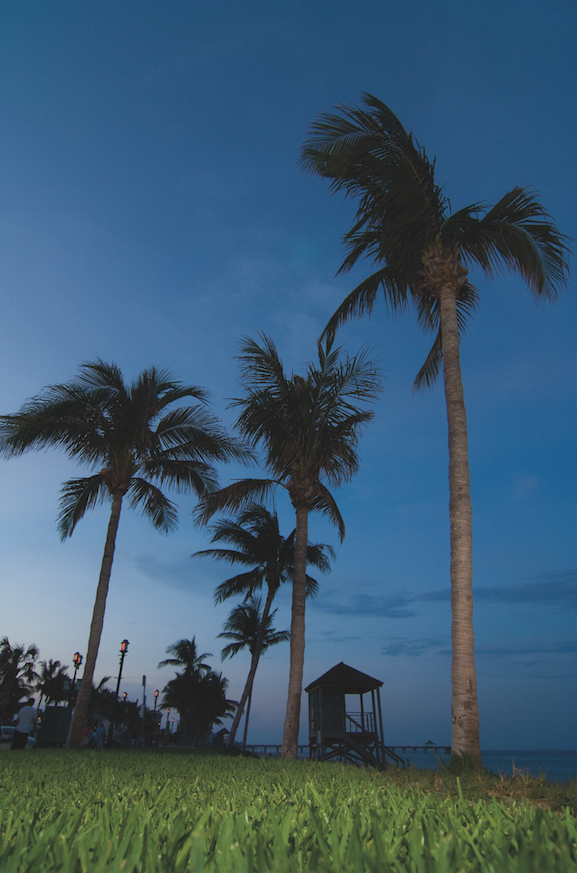
© Mike Hagen
I like to take many of my travel photos after sunset. About 30 to 45 minutes after the sun drops below the horizon, the sky turns a deep blue color and provides a perfect backdrop for silhouettes.
I also like to travel as light as possible, so I don’t generally take much lighting equipment with me on the road. My bag is usually loaded with one or two cameras, three lenses, and one or two flashes. The image to the left was taken in Ft. Lauderdale, Florida, with a D2X and a Dedicated SB-800 flash. I attached the fl ash to an SC-17 TTL cord and held it with my right hand as high as possible above the grass. I used my left hand to trip the shutter.
With a 12–24 mm lens mounted, I set the camera down in the grass and started firing away. Because I couldn’t look through the viewfinder, I had to guess on the composition for each image. I took a number of shots before everything came together in terms of the level horizon, the trees, and the appropriate exposure. The flash was set to TTL BL and –0.3. I kept the flash power a little bit high because I wanted some of the light to fall on the closest palm tree.
Setup Details
- Camera: D2X
- Exposure Mode: Aperture Priority
- Meter Mode: Matrix
- Aperture: f/5.6
- Shutter Speed: 1/15 second
- ISO: 250
- White Balance: Cloudy –1
- Lens: 12-24 mm f/4
- Sync: Slow + Rear
- Flash: SB-800
- Flash Mode: TTL BL
- Flash Comp: –0.3
- Accessories: Diffusion dome,
- SC-1 TTL cord
- Image Quality: NEF (RAW)
Case Study 3: Contrast
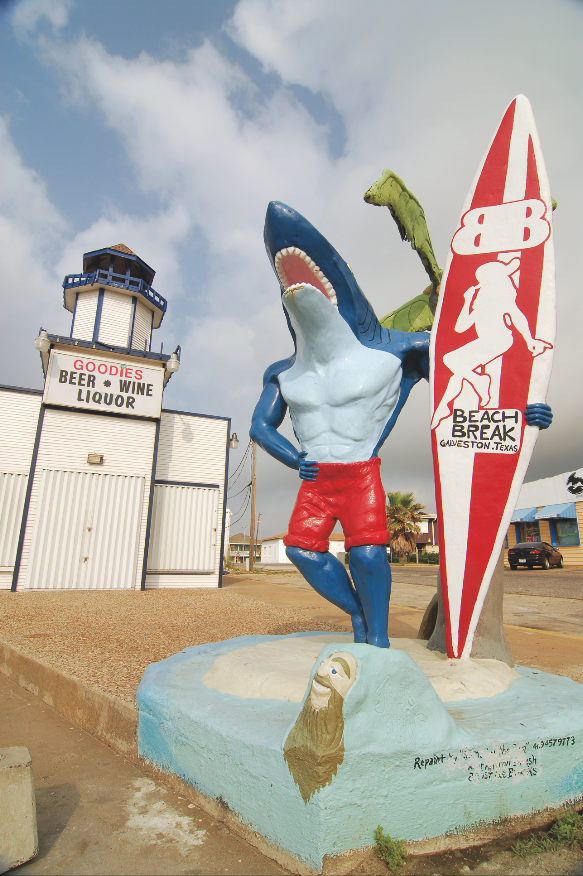
© Mike Hagen
Shots like the one in the figure to the right are actually pretty complicated. The reason is because there is such a wide contrast range, in this case between the white clouds and the dark shadows under the shark. I wanted to fi ll in the shadows with fill flash. If I let the camera do all the thinking for the exposure and flash output, it would have underexposed this image and I would have had to bring it into Photoshop for post-processing.
To make this shot, I set up the D200’s pop-up fl ash as a Commander unit (CSM e3). Then, I used an SB-800 as a TTL Remote unit and dialed down the power to –0.7 by using the D200’s CSM e3.
In addition, I increased the camera’s exposure compensation to +1.0, which increased the amount of ambient light coming into the camera. I did this in order to make the clouds appear bright white. This is an important step because the TTL system on cameras tends to make bright white scenes come out a bit underexposed.
To summarize, I used flash compensation at –0.7 to provide a nice fi ll fl ash for the shadows and camera exposure compensation at +1.0 to make the clouds and building bright white. Use this same approach for photographing bright snow or sunny beaches.
Setup Details
- Camera: D200
- Exposure Mode: Aperture Priority
- Meter Mode: Matrix
- Aperture: f/8
- Shutter Speed: 1/180 second
- ISO: 100
- White Balance: Cloudy –1
- Lens: 12-24 mm f/4
- Sync: Slow + Rear
- Flash: SB-800
- Flash Mode: TTL BL
- Flash Comp: –0.7
- Camera Exposure Comp: +1.0
- Accessories: Diffusion dome, SC-1 TTL
- cord
- Image Quality: JPEG Fine Large
Want to learn more? Well then check out Mike’s full book The Nikon Creative Lighting System, 3rd Edition covering the SB-500, SB-600, SB-700, SB-800, SB-900, SB-910, and R1C1 Flashes.