
When photographing birds, you will learn that patience is a virtue. This means keeping your activities in your blind (your hiding place) to a minimum. No loud noises or waving your lens around. Birds aren’t always predictable and it may take some time for them to start using the feeders that you have set up in your yard. It is important to let them get used to visiting the feeders so they will consider your yard a safe location. Your job is to quietly observe them to learn where they land when they come to feed. Watch for patterns in their behavior.
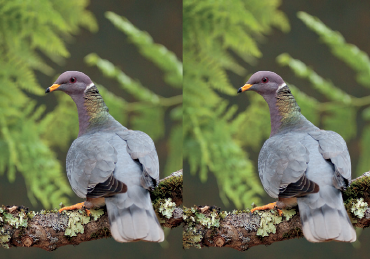
- Birds each have their own particular way of approaching the feeder. The vast majority of birds do one thing that is critical to your success as a bird photographer. They almost always pause for a second or two after they have landed on the perch to look around for predators. This spot on the perch is where you want to focus your camera to capture these moments— they make for some great bird images.
- Make note of the background behind this spot in the frame. It is very important to have a clean, uncluttered background. Be sure the background behind your shot is clear of bright spots and has a nice even color to it.
- Once you have learned the birds’ behavior patterns and are satisfied with your set-up, you can start taking some images: I would suggest checking your images after every sequence to see if there are any changes that need to be made. Take the time to carefully review your work. Check for exposure, composition, and lighting. There should be no harsh or distracting shadows on the bird.
- Head Angle: Head angle refers to the angle of the bird’s head in your image. A bird that is looking away versus one that is looking ever so slightly towards you can mean the difference between a mediocre image and a fantastic one.
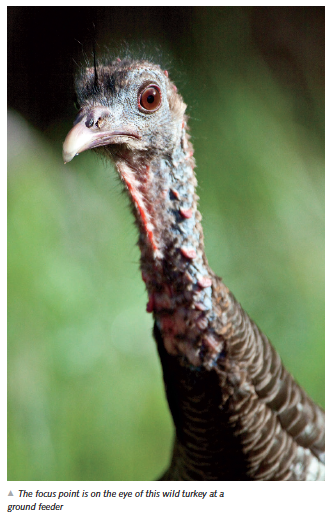
- Catch Light: The “catch light” is a bright spot of specular light in the eye of the bird. Images with a catch light in the eye make a huge difference to the quality of your bird photograph. In photographs without the catch light, the birds’ eyes appear lifeless and flat. Always look for it when you are photographing birds and when you are editing your images. Birds with a catch light look much more alive in images than birds without one.
- Composition—The Rule of Thirds: When composing an image in bird photography, it is a good idea to apply the rule of thirds. The rule of thirds is a guideline of where to place the focal point or the main center of interest in the image. In bird photography, usually the center of interest is the center of the body of the bird. So what is the rule of thirds? First divide the frame or image into equal, vertical thirds. Next divide the image horizontally into thirds. The locations where the lines intersect are called power points. These power points are the locations where you should try to place your bird within the frame of the picture. Try to compose the image with the bird facing into the frame. A bird facing the edge of the frame looks like it’s trying to escape, which creates a feeling of unease.

- When photographing birds, simplify things by setting up, prefocusing your camera, and precomposing the image: I visualize where the bird will be on the perch. This way, when a bird lands, I’m prepared to press the shutter release without causing a lot of motion that may scare it off.
- Where to Focus: When focusing on a bird, the most important focus point is the center of the eye. If your camera has adjustable focus points you should set them so they will be at the approximate point of where the bird’s eye will be. If your camera does not have adjustable focus points, you should prefocus on that area instead, and lock in the focus.
- The Preferable F-Stop: Because birds are almost always moving, you’ll want to use the largest lens opening possible. To do this you should set your camera to Aperture Priority and set the F-stop to the largest available lens opening. The camera will automatically choose the highest shutter speed to match it, which is desirable because high shutter speeds help prevent camera shake and minimize any movement by your subject. Wide-open F-stops are also preferable because they allow the background behind your subject to appear out of focus, which makes the bird stand out.
- The Best ISO Setting: It is preferable to set your ISO to 400 at the very least. Birds move quickly and you are going to need all the speed you can get. On dark or cloudy days, moving up to ISO 800 is a good idea.
For more ideas about how to take excellent photographs of the birds in your own backyard, read Secrets of Backyard Bird Photography by J. Chris Hansen.